Expert Precision Machining
Innovation and high precision for a high-value performance.
Our technology
LATHES
Our lathe department includes Numerical Control lathes with two, three, and five axes.
The largest parts we can turn measure up to 1200 mm in length with a maximum diameter of 400 mm.
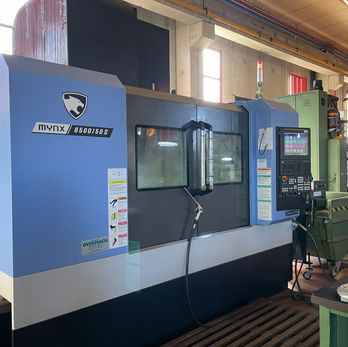
MACHINING CENTERS
Our milling department comprises 3, 4, and 5-axis machining centers with tilting/rotating tables. The largest parts we can produce have a diameter of 1250 mm for horizontal and vertical head machining.
CMM
We utilize a Coordinate Measuring Machine by Mitutoyo with 6 axes, capable ofì measuring dimensions up to 800x750 mm, with the possibility of automatic probe change to perform a wide range of checks.
CAD-CAM
We employ VISI CAD-CAM software for the creation of 2D and 3D drawings, as well as for executing processes that are converted into machine language and sent to the machining centers.

How we operate.
Our primary objective is to ensure the quality of our products by aligning them with our
customers’ specifications. Our unwavering commitment to quality is demonstrated
through comprehensive traceability at every stage of the manufacturing process.
Material traceability is established from the quotation stage and extends through
material receiving. Material receiving is meticulously recorded on an internal acceptance
form, ensuring inclusion of the 3.1 mill certificate along with the material. The technical
office oversees CAD/CAM processing, generating CAD drawings from mechanical
drawings or from scratch, verifying models generated in CAD, and incorporating them
into CAM software, which then controls the machine tool. The processing cycle
concludes with the testing phase, conducted immediately after machining and before
packing, utilizing gauges and CMM machines as needed.


ANALYSIS
We analyze customer needs to produce a personalized offer according to the technical
specifications provided at the ordering stage.
DESIGN
We create 2D and 3D models and related CAM data useful for the machining centers in
the development of prototypes.
PROCESSING
We execute machining processes for material removal using high-precision numerical
control machines.
QUALITY CONTROL
We conduct dimensional, geometric, and shape control checks on mechanical parts to
assess their conformity.
DELIVERY
This phase is dedicated to customized packaging according to the specific needs of the customer, as well as any customs requirements (e.g., fumigation), ensuring the nature
of the manufactured mechanical parts is maintained during shipment.

View


